Choosing a Vacuum Breaking Valve is a small decision with serious consequences. A wrongly sized unit can leave a tank buckled, a pipe distorted, or a pump starved of flow. The damage may appear slowly. The purchase order does not.
Industry reports show why valve selection deserves more attention. Grand View Research valued the global industrial valves market at approximately USD 78 billion in 2023, with continued growth expected through 2030. MarketsandMarkets also identifies process safety, water infrastructure, and industrial automation as major demand drivers. These reports cover industrial valves broadly, not vacuum breakers alone. That distinction matters.
“Valve selection must begin with the process, not the catalogue,” says Philip L. Skousen, author of The Valve Handbook. It is a useful warning. Many buyers compare connection sizes first. That can be a mistake.
The seven tips in this guide examine vacuum level, flow capacity, materials, temperature, installation position, testing, and maintenance access. They also consider standards such as ASME B16.34 and API 520 where applicable. A vacuum breaker for a steam line may require different protection from one used on a storage tank or condensate system.
Look closely at the details. Is the body stainless steel or coated carbon steel? Does the seat tolerate repeated cycling? Can a technician reach the valve above a narrow tank roof?
There is no universal best model. Sometimes, the cheapest option works. Sometimes, it quietly creates the next failure.
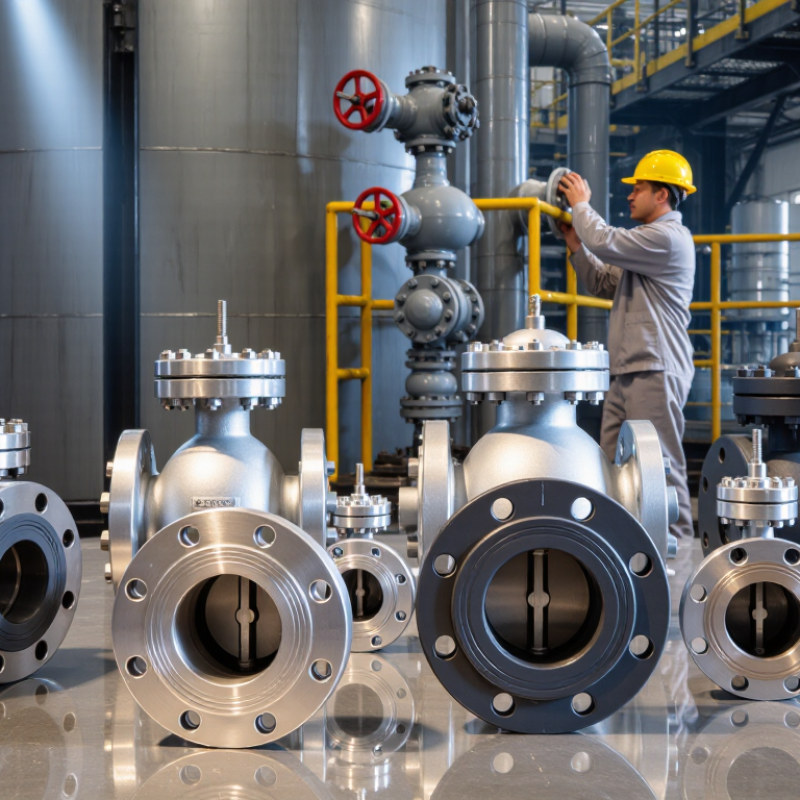
A vacuum-breaking valve admits air when falling pressure creates a vacuum. Its purpose is protective, not process control. It can reduce tank collapse, reverse flow, and siphon damage. However, the valve only works when its opening pressure matches the system. That detail is often underestimated. Before buying, identify why the vacuum forms. Rapid draining, steam condensation, pump shutdown, and cooling can create different demands.
Record the design vacuum, maximum pressure, temperature, fluid composition, and required airflow. A valve designed for clean air may perform poorly with dust, sticky vapor, or corrosive gas. Check the body, spring, seat, and seal materials against the actual medium. Do not choose by connection size alone. Calculate the air intake capacity during the fastest pressure change. I would not rely on a catalog pressure value without reviewing the system conditions.
Installation also affects performance. Keep the valve accessible for inspection and protect its inlet from water, dirt, and accidental blockage. Confirm the correct mounting position and drainage arrangement. In real installations, the first calculation is not always right. Review shutdown records, pressure trends, and unusual operating sounds when available. A manual test can reveal sticking, but it cannot replace a properly designed inspection schedule. Allow a practical pressure margin, especially where temperature changes are frequent.
7 Vacuum Breaking Valve Buying Tips
Check Valve Type, Pressure Range, and Airflow Requirements
Choosing a vacuum breaking valve starts with the check valve type. A spring-loaded model can respond quickly, while a gravity-operated design may need careful mounting. Confirm the valve opens when pressure falls, not only when airflow reverses. That detail prevents unwanted vacuum damage in tanks, pipes, and heat exchangers. I once inspected a system where the valve direction was correct, but the installation angle was wrong. The result was slow opening and noticeable noise.
Review the full pressure range, including normal, peak, and accidental conditions. The valve should open before the vessel reaches its damaging vacuum limit. It should also remain closed during ordinary positive pressure. Ask for tested cracking pressure, resealing pressure, and pressure-drop data. Nominal pipe size is not enough. A narrow passage can restrict airflow and create a pressure spike. Measure the system’s expected airflow in actual operating conditions, including temperature and elevation changes. This step is often skipped.
Compare airflow capacity at the required pressure difference, not at an attractive catalog value. Check materials, seal compatibility, temperature limits, and cleaning access. A clear inspection point helps technicians spot sticking or contamination. Leave room for maintenance. My earlier selection focused too heavily on response speed, and I underestimated service access. That mistake was avoidable. Request installation instructions, test records, and maintenance intervals from a qualified supplier. Confirm the valve’s specifications with an engineer familiar with the complete system.
| No. | Buying Tip | What to Check | Typical Selection Guidance | Why It Matters | Application Note |
|---|---|---|---|---|---|
| 1 | Select the Correct Valve Type | Compare spring-loaded, weighted, pilot-operated, and combination vacuum-breaker designs. Confirm whether the valve must admit air only or also prevent reverse liquid flow. | Use a spring-loaded design for compact, responsive protection; use a combination vacuum breaker and check valve where reverse flow must also be blocked. | The internal mechanism determines response speed, installation position, leakage behavior, and maintenance needs. | For liquid pipelines, verify that the valve is suitable for the fluid and can prevent siphoning or pipe collapse. |
| 2 | Match the Vacuum and Pressure Range | Check the minimum and maximum operating pressure, vacuum rating, inlet pressure, and allowable differential pressure. | Atmospheric pressure is approximately 101.3 kPa absolute at sea level. Select a valve whose rated vacuum and positive-pressure limits exceed the system's worst-case conditions. | A valve with an unsuitable pressure range may open too early, fail to open during a vacuum event, or suffer seat and diaphragm damage. | Consider altitude, temperature, pump shutoff conditions, and transient pressure changes when converting between gauge and absolute pressure. |
| 3 | Verify the Airflow or Air-Admittance Requirement | Determine the required air-admission rate during pump shutdown, line drainage, rapid cooling, or liquid-column separation. Review rated flow, Cv, or effective orifice area. | Size the valve using the manufacturer's test conditions and the system's required flow rate; do not select by pipe diameter alone. | Insufficient airflow can allow damaging vacuum formation even when the connection size appears correct. | For gases, confirm whether the published capacity is stated in standard, normal, or actual volumetric flow units. |
| 4 | Check the Opening or Cracking Pressure | Confirm the pressure differential required to open the valve and the pressure at which it reseats. | Low-cracking-pressure models are commonly preferred for vacuum protection, but the exact setting must match the process and valve design. | A high opening pressure can delay air admission, while an overly sensitive valve may admit air during normal operating fluctuations. | Review both opening and reseating characteristics if the system experiences pressure pulsation or frequent cycling. |
| 5 | Choose Compatible Materials and Seals | Check body, spring, trim, seat, and elastomer materials against the process fluid, temperature, humidity, and cleaning chemicals. | Common body materials include brass, stainless steel, and engineered polymers; seal selection must be based on chemical and temperature compatibility. | Material incompatibility can cause swelling, embrittlement, corrosion, leakage, or premature failure. | For sanitary, corrosive, or outdoor service, verify surface finish, corrosion resistance, and cleaning requirements. |
| 6 | Confirm Connection Size and Installation Position | Verify nominal pipe size, thread or flange standard, flow direction, available clearance, and whether the valve supports horizontal or vertical installation. | Use the specified connection standard and install the valve at the location where vacuum can develop, commonly near high points or equipment inlets. | Incorrect connections or orientation can restrict airflow, cause leakage, or prevent the mechanism from operating correctly. | Allow access for inspection and avoid placing the valve where condensate, debris, or flooding can obstruct the air inlet. |
| 7 | Review Testing, Maintenance, and Safety Features | Look for pressure-test data, leakage limits, inspection intervals, replaceable seals, protective screens, and compliance requirements relevant to the installation. | Prefer designs with documented performance data, accessible service parts, and clear installation and maintenance instructions. | Reliable testing and maintenance reduce the risk of blocked air passages, seat leakage, and undetected vacuum damage. | Inspect after commissioning and following contamination, freezing, unusual pressure events, or extended periods without operation. |
7 Vacuum Breaking Valve Buying Tips
Match Materials, Connections, and Installation Environment
Material compatibility should guide the purchase. Stainless steel suits many wet and corrosive areas, while engineered plastics may fit lighter-duty systems. Check the fluid, temperature, pressure, and cleaning chemicals before choosing. A valve that looks robust can still fail quickly in an aggressive process.
Connection type matters during installation. Compare threaded, flanged, and sanitary connections with the existing pipework. Measure the port size, thread standard, and available clearance. Do not assume a familiar fitting will match. One small mismatch can create leaks, delayed commissioning, or expensive adapters. Verify the valve’s opening pressure and airflow capacity against the equipment’s vacuum requirements.
The installation environment deserves equal attention. Outdoor systems may need protection from rain, dust, freezing temperatures, and direct heat. Mount the valve where inspection and testing remain practical. Avoid low points that collect liquid unless the design supports drainage. In field reviews, access is often underestimated. Maintenance becomes difficult when a valve sits behind insulation or crowded pipework.
Read the technical documentation carefully. Look for material certificates, pressure ratings, test methods, and replacement guidance. Independent testing can strengthen confidence, but paperwork never replaces correct installation. A checklist can still miss local conditions. Leave room for that uncomfortable question: what happens if the process changes later?
How to read this chart: The values show the theoretical circular area of common nominal connection sizes, calculated from the port diameter. Actual flow capacity can be lower because of valve internals, pressure differential, and the valve’s flow coefficient.
When buying a vacuum breaking valve, begin with the hazard, not the price. Tip 1: Confirm the valve’s vacuum and pressure ratings match your vessel. A mismatch can cause collapse or unwanted air entry. Tip 2: Check the body and internal materials against moisture, chemicals, temperature, and cleaning agents. Stainless steel may perform well, but compatibility still requires verification.
Tip 3: Examine safety features closely. Look for reliable set-pressure control, clear flow direction, protective screens, and safe discharge routing. Tip 4: Request test reports, material certificates, and traceable inspection records. The valve should comply with standards applicable to your region, vessel, and piping system. Do not accept a vague “meets standards” statement. An accredited inspection body can provide stronger evidence. Tip 5: Confirm whether the design prevents sticking after long idle periods. This detail is often overlooked.
Maintenance affects the real cost. Tip 6: Choose a valve with accessible seals, removable covers, and visible inspection points. Ask how often testing, cleaning, and calibration are recommended. Tip 7: Check replacement-part availability before purchase. During field inspections, I have seen valves remain unused because a small seal was unavailable. That was preventable. Keep a maintenance log with dates, readings, cleaning work, and technician observations. I also consider over-specification a risk; a larger valve is not automatically safer. Review the application with a qualified engineer, then verify the final selection against the equipment documentation.
Compare suppliers beyond the initial quotation. Ask for material certificates, pressure-test records, leak-rate data, and delivery history. ISO’s 2022 Survey recorded more than 1.2 million ISO 9001 certificates worldwide, but certification alone does not prove valve performance. Confirm whether the supplier’s quality system covers machining, cleaning, testing, and final inspection. For vacuum service, request compliance evidence for relevant standards, such as ISO 1609 for vacuum flanges or ISO 15848-1 for industrial valve fugitive emissions testing. Certificates should match the exact model and production batch.
Pricing needs careful normalization. Compare the valve, actuator, sensors, spare seals, testing, freight, and commissioning as separate line items. A cheaper valve may need frequent seal replacement or longer troubleshooting time. Ask suppliers to provide expected service intervals and a five-year ownership estimate. Keep assumptions visible. They are often incomplete. Support matters after installation. Check response times, replacement-part availability, technical drawings, and local service coverage. A supplier offering remote troubleshooting within one business day may reduce costly chamber downtime. Request two customer references using similar vacuum levels and cycle rates. One overlooked detail is training: clear maintenance instructions can prevent incorrect venting, contamination, and premature seal damage.